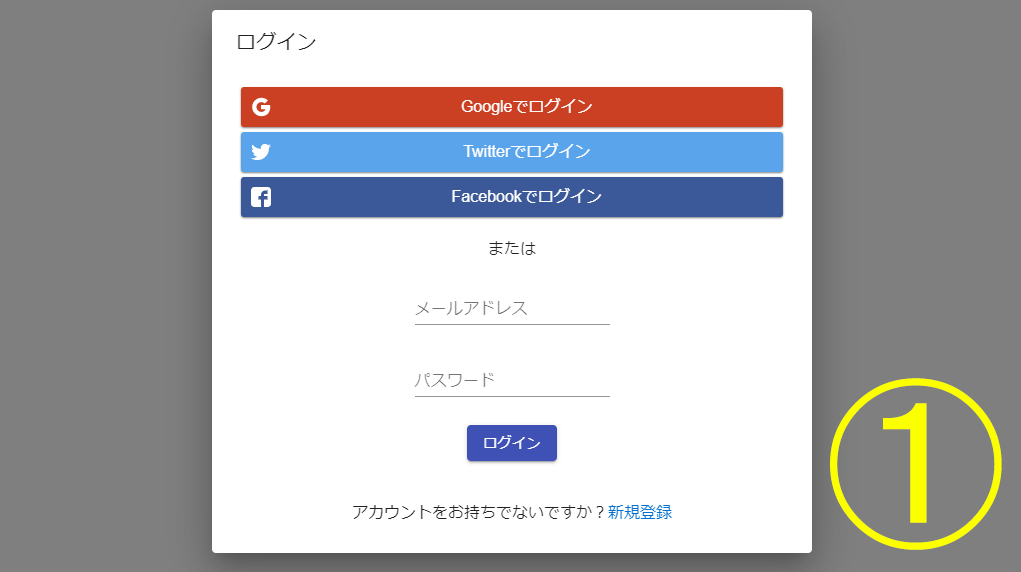
ReactとFirebaseを使用してProgateのようなログインフォームを作成してみます。Google、Twitter、FacebookのソーシャルログインとEメール、パスワードを用いた一般的なログインを実装します。
ソーシャルログインはFirebaseを利用すれば比較的簡単ですが、結構大変でした。。私と同じように個人で開発している人のお役に立てれば幸いです。
React、Redux、react-router、Firebaseの基本的な使い方を理解している方を対象としています。全4回です。
使用するパッケージ
- 状態管理にredux、、react-redux、
- 非同期処理にredux-thunk
- cssフレームワークにmaterial-ui
- ルーティングにreact-router-dom
完成品はGitHubにアップしています。
プロジェクト作成
create-react-appで作成します。このままでもいいのですが、ESlintとPrettierを設定した方が便利なので設定しておきます。使うエディタはVS Codeです。自分のエディタがある人はそれを使ってください。
VS CodeでReact、ESlint、Prettierを設定する方法は下記の記事を参照してください。
GitHubに設定済のプロジェクトがあるのでダウンロードしましょう。
#install create-react-app

npm -g install create-react-app


# clone repo

git clone https://github.com/nineharker/react-vscode-eslint-prettier.git


cd react-vscode-eslint-prettier


yarn install
必要なファイルを作成する
まず最低限のページを作成します。必要なパッケージをインストールしましょう。
yarn add @material-ui/core redux react-redux react-router-dom redux-thunkランディングページとログイン後のページの二つを作ります。それと二つのページで共有するヘッダーを用意します。src/componentsディレクトリ作成し、 components以下にLandingPage.jsxとLoginedPage.jsx、NavBar.jsxを作成します。
import React, { Component } from 'react';


# ランディングページ

class LandingPage extends Component {

  render() {

    return <div>LandingPage</div>;

  }

}


export default LandingPage;
import React, { Component } from 'react';


# ログイン後のページ

class LoginedPage extends Component {

  render() {

    return <div>LoginedPage</div>;

  }

}


export default LoginedPage;
ヘッダーはmateriaru-uiを使います。Reactのコンポーネントとして利用できます。
AppBar参考
https://material-ui.com/components/app-bar/
import React, { Component } from 'react';

import AppBar from '@material-ui/core/AppBar';

import Toolbar from '@material-ui/core/Toolbar';

import { makeStyles } from '@material-ui/core/styles';

import Typography from '@material-ui/core/Typography';

import Button from '@material-ui/core/Button';


const useStyles = makeStyles(theme => ({

  root: {

    flexGrow: 1,

  },

  menuButton: {

    marginRight: theme.spacing(2),

  },

  title: {

    flexGrow: 1,

  },

}));


export default function NavBar() {

  const classes = useStyles();

  return (

    <AppBar position="static">

      <Toolbar>

        <Typography variant="h6" className={classes.title}>

          News

        </Typography>

        <Button color="inherit">ログイン</Button>

      </Toolbar>

    </AppBar>

  );

}
ルーティング
react-router-domを使用して二つのページをルーティングします。App.jsxを編集しましょう。<Switch>の外に<NavBar />を書くことで、どちらのページでもヘッダーが表示されるようになります。
react-router参考
https://qiita.com/muijp/items/b4ca1773580317e7112e
import React, { Component } from 'react';

import { Router, Route, Switch } from 'react-router-dom';


import history from './history';

import LandingPage from './components/LandingPage';

import LoginedPage from './components/LoginedPage';

import NavBar from './components/NavBar';


class App extends Component {

  render() {

    return (

      <Router history={history}>

        <NavBar />

        <Switch>

          <Route path="/" exact component={LandingPage} />

          <Route path="/logined" exact component={LoginedPage} />

        </Switch>

      </Router>

    );

  }

}


export default App;
react-router-domのBrowserRouterではなくRouterを使っているので、別に履歴を管理するhistory.jsが必要になります。 src以下に作成しましょう。historyが別にあることによってGoogleアナリティクスの設定などができるようになります。
const createHistory = require('history').createBrowserHistory;


export default createHistory();
それではyarn startでローカルサーバーを起動してみましょう。
http://localhost:3000/ に青色のヘッダーとLandingPageという文字、
http://localhost:3000/logined に青色のヘッダーとLoginedPageという文字があればルーティングは完了です!
おわり
今回で基本的なページを作成することができました! 全体のページ数はユーザーが最初に訪れるランディングページと、ログイン後に偏移するページの二つです。
次回はログインフォームを作っていきます。普通に作ると面倒ですが、フレームワークを使えば簡単に実装できます。