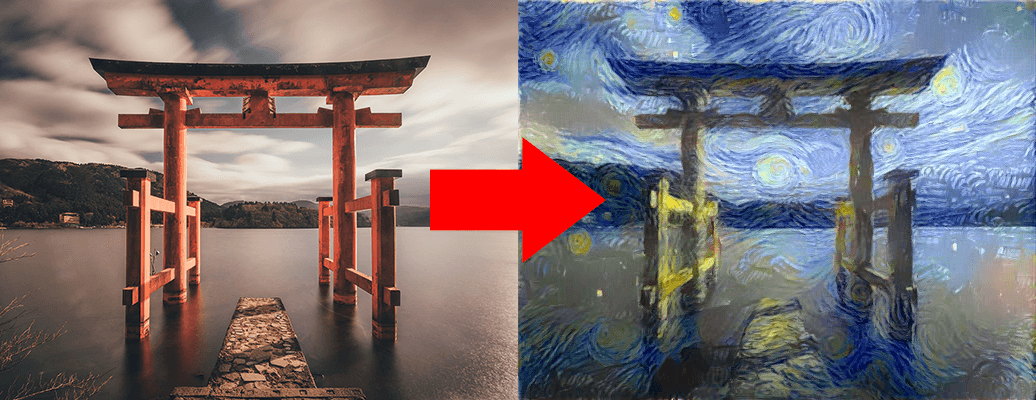
ある画像に画像のスタイル(画風)を適用した合成画像を生成するStyle TransferをPytorchで実装してみます。例のごとくGoogle Colaboratory(以下Colab)を使用しましょう。
PytorchでStyleTransferを実装して合成画像を生成する
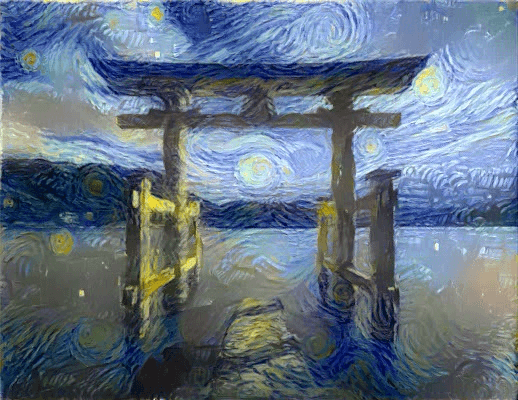
この記事の完成品です。
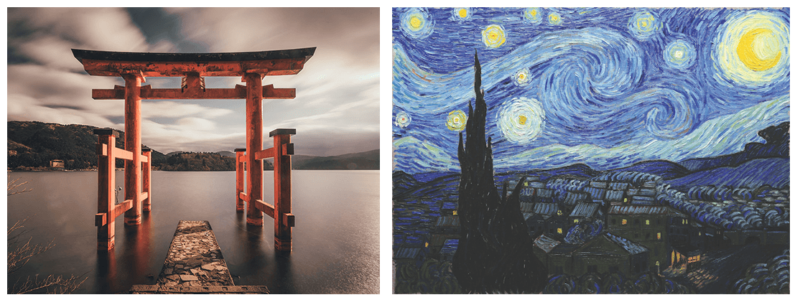
以下が元となった画像と画風の元となったゴッホの絵です。 画像はunsplashから頂きました。 鳥居の画像に上手くゴッホの画風が適用されています。
前準備
学習する前の処理を実装しましょう。
必要なライブラリとGoogleドライブのマウント
必要なライブラリをインポートしましょう。今回はGoogleドライブをマウントして、ドライブにある画像に対して学習してみます。
pytorchと画像を表示するためにPillowをインストールしましょう。
!pip install torch torchvision
!pip install Pillow==4.0.0
ライブラリをインポートします。
%matplotlib inline
import torch
import torch.optim as optim
from torchvision import transforms, models
from PIL import Image
import matplotlib.pyplot as plt
import numpy as np
Googleドライブをマウントします。これでColabからドライブにアクセスすることができます。
from google.colab import drive
drive.mount("/content/drive")
モデルの定義
VGGを使います。deviceのgpuも定義しておきます。
vgg = models.vgg19(pretrained=True).features

for param in vgg.parameters():
  param.requires_grad_(False)

device = torch.device("cuda" if torch.cuda.is_available() else "cpu")
vgg.to(device)
画像を表示する関数を定義
画像をパスからロードしてTensorを返す関数を定義します。サイズを指定できるようにしています。
def load_image(img_path, max_size=400, shape=None):

  image = Image.open(img_path).convert('RGB')
  if max(image.size) > max_size:
    size = max_size
  else:
    size = max(image.size)

  if shape:
    size = shape
  in_transform = transforms.Compose([
                    transforms.Resize(size),
                    transforms.ToTensor(),
                                            ])

  image = in_transform(image).unsqueeze(0)

  return image
画像を読み込んで表示する
画像のパスを定義します。ここは便宜パスを設定してください。最終的な画像のもととなる画像をcontent_pathとして、画風のもととなる画像をstyle_pathとして定義しています。
images_path ='drive/My Drive/'
content_path = images_path + 'content.jpg'
style_path = images_path + 'style.jpg'
ロードしましょう。二つの画像のサイズを合わせています。
content = load_image(content_path).to(device)
style = load_image(style_path, shape=content.shape[-2:]).to(device)
Tensorからnumpyに変換して、画像を表示できるようにする関数を定義
def im_convert(tensor):
  #Tensorをnp.arrayに変換する
  image = tensor.to("cpu").clone().detach()
  image = image.numpy().squeeze()
  image = image.transpose(1,2,0)
  image = image * np.array((0.5, 0.5, 0.5) + np.array((0.5, 0.5, 0.5)))
  image = image.clip(0, 1)

  return image
Colab上に画像を表示します。
fig, (ax1, ax2) = plt.subplots(1, 2, figsize=(20, 10))
ax1.imshow(im_convert(content))
ax1.axis("off")
ax2.imshow(im_convert(style))
ax2.axis("off")
特徴を抽出する
CNNは大きく二つの層に分かれます。画像から特徴を抜き出す前半の層と、抜き出した特徴から画像を最終的に分類する後半の層です。
二つの画像の特徴をCNNで抽出し、その特徴の差を損失関数にして最終的な画像を学習させます。
そのために画像をCNNに入れて、特定の層で特徴を抽出しましょう。VGGの0番、5番、10番、19番、21番、28番目の層で抽出します。
まず関数の定義です。
def get_features(image, model):
#   Feature Extraction
#   特徴を抜き出すレイヤー
  layers = {'0': 'conv1_1',
            '5': 'conv2_1',
            '10': 'conv3_1',
            '19': 'conv4_1',
            '21': 'conv4_2',
            '28': 'conv5_1',}

  features = {}

  for name, layer in model._modules.items():
#     CNNを回して
    image = layer(image)
#   特定のレイヤーで特徴を抽出する
#  ここでは 0番 5番 10番 19番 21番 28番
    if name in layers:
      features[layers[name]] = image

  return features
特徴を抽出しましょう。
content_features = get_features(content, vgg)
style_features = get_features(style, vgg)
画風の元となる画像は単純に特徴を比較するのではなく、特徴のグラム行列を比較します。グラム行列を計算する関数を定義しましょう。
def gram_matrix(tensor):
  #   グラム行列を計算する
  _, d, h, w = tensor.size()
  tensor = tensor.view(d, h * w)
#   転置行列と行列の掛け算
  gram = torch.mm(tensor, tensor.t())

  return gram
スタイルのグラム行列を保持する
style_grams = {layer: gram_matrix(style_features[layer]) for layer in style_features}比較する層の重みを設定します。
style_weights = {'conv1_1':1.,
                 'conv2_1':0.75,
                 'conv3_1':0.2,
                 'conv4_1':0.2,
                 'conv5_1':0.2}

content_weight = 1 #alpha
style_weight = 1e6 #blue
最終的な画像はcontentの画像をコピーして学習させていくのでコピーし、targetとして定義します。
target = content.clone().requires_grad_(True).to(device)学習
準備は完了です。学習させていきましょう!途中経過を記録して後で動画にできるようにしておきます。 ハイパーパラメータを設定しましょう。
show_every = 300
optimizer = optim.Adam([target], lr=0.003)
steps = 10000
total_capture_frame_number = 500

height, width, channels = im_convert(target).shape
image_array = np.empty(shape=(total_capture_frame_number, height, width, channels))
capture_frame =steps/total_capture_frame_number
counter = 0
では学習です。
for ii in range(1, steps+1):
target_features = get_features(target, vgg)
# コンテンツとの損失関数の計算
content_loss = torch.mean((target_features['conv4_2'] - content_features['conv4_2'])**2)
# スタイルとの損失関数の計算
style_loss = 0
for layer in style_weights:
target_feature = target_features[layer]
target_gram = gram_matrix(target_feature)
style_gram = style_grams[layer]
# 重み * 二乗和誤差
layer_style_loss = style_weights[layer] * torch.mean((target_gram - style_gram)**2)
_, d, h, w = target_feature.shape
style_loss += layer_style_loss / (d * h * w)
# トータルの損失関数
total_loss = content_weight * content_loss + style_weight * style_loss
optimizer.zero_grad()
total_loss.backward()
optimizer.step()
#経過観察
if ii % show_every == 0:
print('Total loss: ', total_loss.item())
print('Iteration: ', ii)
plt.imshow(im_convert(target))
plt.axis("off")
plt.show()
# 動画用に保管
if ii % capture_frame == 0:
image_array[counter] = im_convert(target)
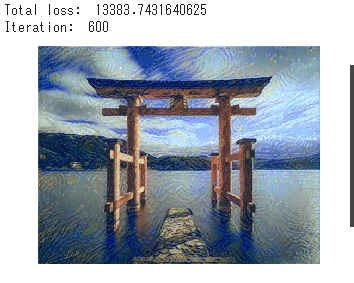
counter = counter + 1少し時間がかかると思います。
600回目
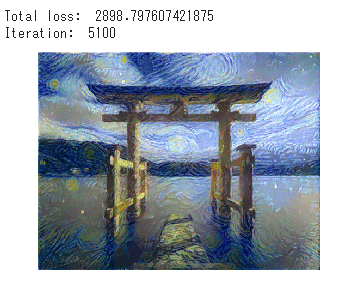
5100回目
9900回目
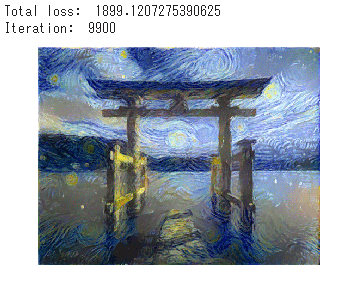
きちんと学習できています。
動画を書き出す
OpenCVを使って動画を作成します。
import cv2

frame_height, frame_width, _ = im_convert(target).shape
vid = cv2.VideoWriter('output.mp4', cv2.VideoWriter_fourcc(*'XVID'), 30, (frame_width, frame_height))

for i in range(total_capture_frame_number):
  img = image_array[i]
  img = img*255
  img = np.array(img, dtype = np.uint8)
  img = cv2.cvtColor(img, cv2.COLOR_BGR2RGB)
  vid.write(img)

vid.release()
ダウンロードしましょう。
from google.colab import files
files.download('output.mp4')
動画を再生すると学習過程を見ることができます。
おわりに
今回はPytorchを使ってStyle Transferを実装してみました。Google ColaboratoryのGPUを使えば簡単に試すことができます。Googleドライブの中に保存するようにすればColabのインスタンスがなくなっても大丈夫です。是非、色々他の画像を試してみてください。